
This episode is all about Chuck...
In your dreams.
 |
Marmota “Chuck” Monax
|
I am also not talking about the Woodchuck. (by the way: Why do Woodchuck’s “chuck” wood anyway? Why don’t they just “toss” wood like everyone else? Is it because they don’t have opposing thumbs?)
Instead, we are going to talk about Jacobs Chuck. Actually, it is MY chuck, it is only named after Arthur I. Jacobs, who, in 1902, invented a device with jaws, a toothed sleeve, and a key such that it can be used to clamp onto various bits.
The Shopsmith uses a Jacobs Chuck for horizontal and vertical drilling.
I found Rusty's Jacobs Chuck in the bottom of the parts bucket. I soaked the chuck in evapo-rust and polished it up nicely...but it was still stuck and wouldn't turn more than a 1/4 rotation. I simply had a stuck chuck. Shall I attempt to disassemble it and clean it thoroughly? (Do they even come apart?).
Maybe I should just "chuck" the whole idea and buy a new one...ahem.
Luckily, a clever person with a user name of MICKYD of the Shopsmith 10ER Users group, created a nice tutorial on how to disassemble and reassemble the Jacobs Chuck.
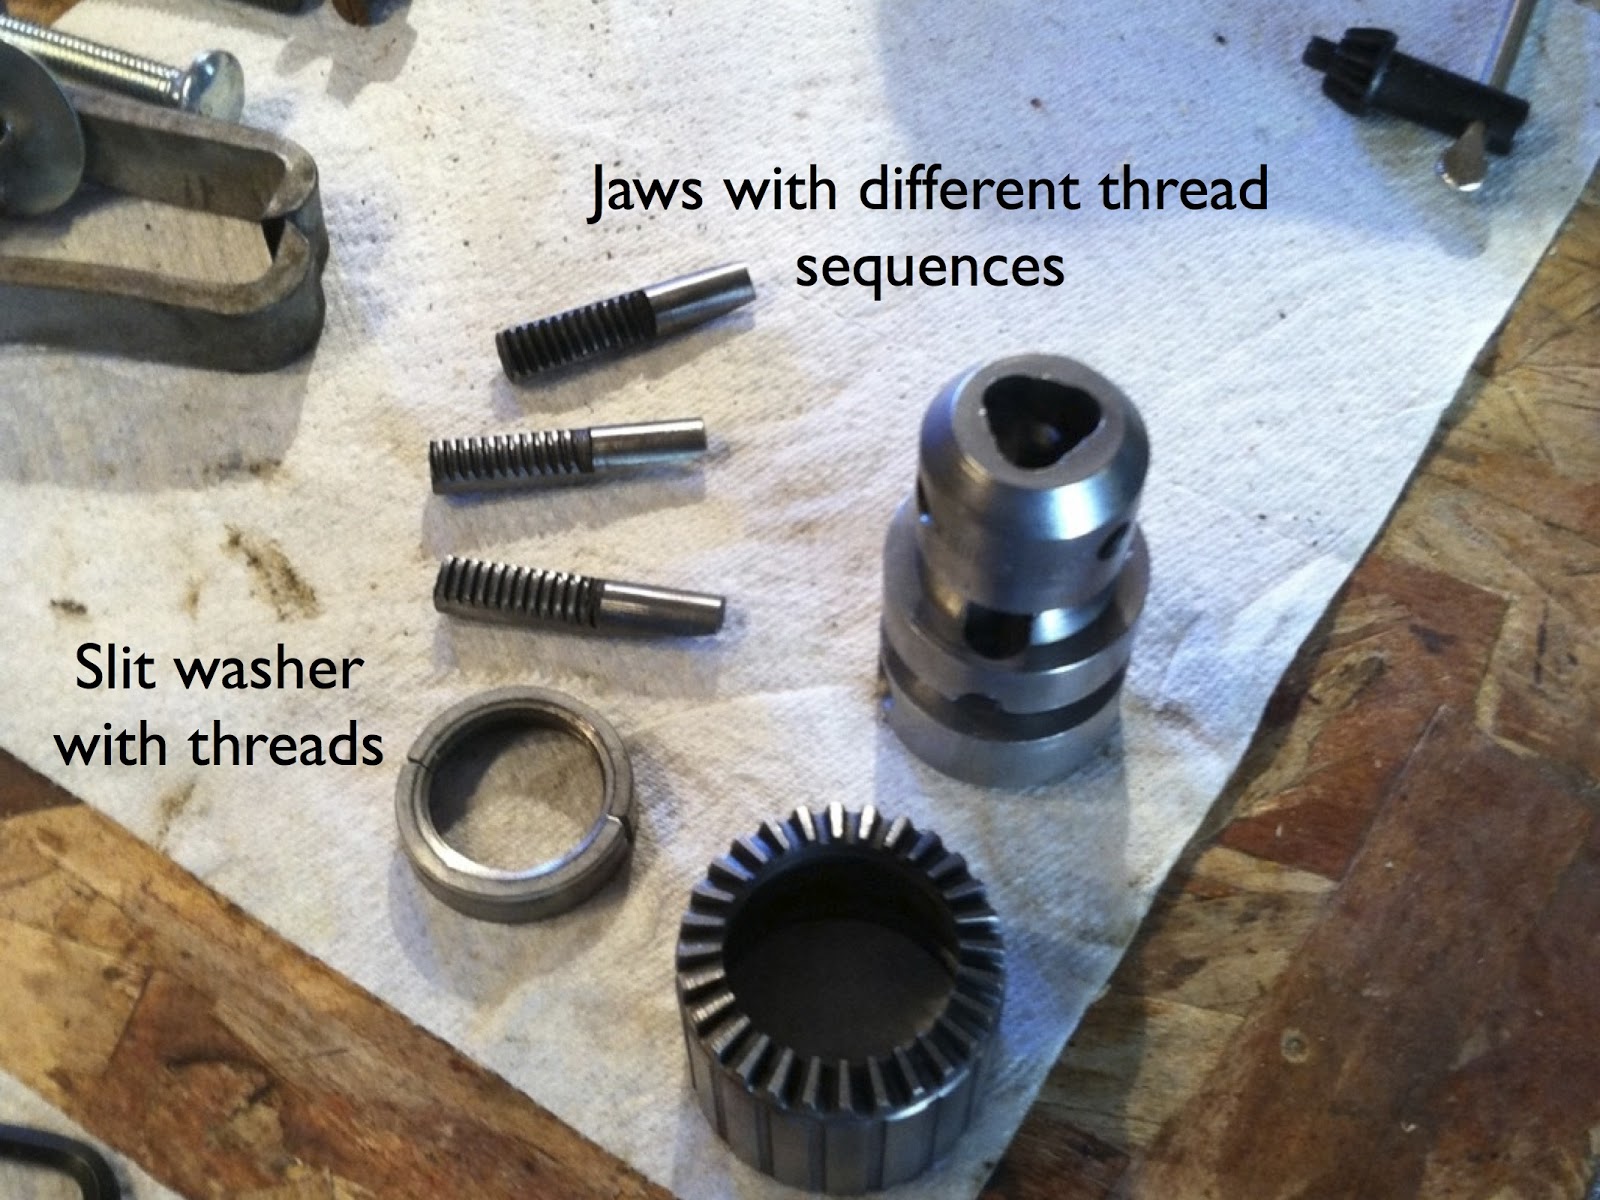
Following his procedure, I successfully ended up with a pile of Jacobs Chuck parts.
It turns out that the three jaws which go in and out of the Chuck and clamp down on the drill bit are not identical. They each have grooves or threads which are different...and they are assembled inside the chuck in a very specific sequence. A split washer is what rotates and moves the jaws up and down, or in and out if you happen to swing that way.
The procedure recommended marking the jaws and the housing before they are removed so that they can be put back together in that same sequence. I used a marking pen to do just that....and in my cleverness, I managed to remove all markings during the cleaning and polishing process. Great. Good job Dan. Now what?
In looking closely at the jaws, the grooves are designed as a beginning, middle and end creating a thread sequence. The core housing, as it so happens, was also stamped with a “1, 2, and 3” in a clockwise direction (A dead give-away).
 Logic says that if I aligned the three jaws in the correct sequence, it should work. I reassembled the unit according to MICKYD’s procedure, greased up the jaws, and placed them in what I believed to be the correct thread sequence...and voila! They fit, the unit rotates properly, and the jaws even go in and out. Amazing.
After 20 years of separation, Rusty and Chuck were re-united....not a dry eye in the room. The Chuck can now be used for drilling, and a variety of woodworking and mechanical projects.
 |
| Rusty and Chuck...Together Again |
We even took time off to go camping...roast some marshmallows, and be together...just me and the boys.
The next Shopsmith Episode #8: Rusty finally begins reassembly...or will he?


 Logic says that if I aligned the three jaws in the correct sequence, it should work. I reassembled the unit according to MICKYD’s procedure, greased up the jaws, and placed them in what I believed to be the correct thread sequence...and voila! They fit, the unit rotates properly, and the jaws even go in and out. Amazing.

No comments:
Post a Comment